Cooling & heating system (16 articles)
The way the water flows (also click here for line diagrams)
The header tank is plumbed into the cabin heater circuit. If the cabin heater is off, there will be no flow through the smaller hoses (3/4 inch ID) attached to the header tank. Flow in that circuit starts at the rear of the cylinder head on some vintages, on the rear of the intake manifold water passage on other vintages. Either way, water leaves the rear of the engine, flows through the heater valve and heater core (matrix). Then it returns via a copper pipe routed across the face of the firewall to the left side of the engine where it turns forward. A 3/4 inch hose attaches there and runs forward along side the engine, through the header tank and down to the lower radiator return hose.If the heater valve is off, there should be no flow through the header tank. That's normal. If the valve is on and there is no flow, the heater core is probably plugged with sediment.
It's a centrifugal pump. The water enters the pump via the lower radiator hose and is routed internally to the center of the front side of the impeller. Centrifugal force (which really doesn't exist, but we'll avoid the physics for now... ) throws the water radially outward along the rotor vanes until it exits at the perimeter of the rotor.
Backwards curved blades are a way of slowing the water velocity and increasing pressure. Forwarded curved blades would increase velocity and decrease pressure. In a water pump, pressure is usually more important than velocity and the blades are curved backward. In "some" air fans, high velocity is the goal and the blades are curved forward.
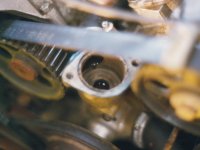
The normal circulation enters from the lower radiator hose to the center of the front of the impeller. Radially outward through the impeller into the scroll housing. The back half of the scroll housing is cast into the front face of the engine block. On the right side (carb side) of the block/scroll housing there is a rectangular hole that leads into the block's water jacket. Coolant passes through there, into the block, up into the cylinder head and out into the intake manifold's water passage. A rubber hose connects that passage back to the thermostat housing.
When the engine is cold and the thermostat is closed, the coolant can't leave the engine and go to the radiator. Instead it is shunted back to the front of the impeller and recirculated.
The proper thermostat has a round disk added towards the bottom. When it's installed, the disk blocks off (partitions) the internal water discharge passage in the pump. Water leaving the impeller hits the bottom of that disk and is forced to turn 90 degrees and go through the rectangular opening that leads into the block. Water returning from the intake manifold hits the top side of the disk and a portion is diverted back to the front of the impeller and is recirculated.
With the THERMOSTAT REMOVED from the housing, there is nothing to force the water from the impeller to turn and flow through the rectangular hole and into the engine. It would rather just recirculate. Flowing water does not like to turn and it will take the path of least resistance. That does not include a 90 degree turn into the engine. When the thermostat finally opens, the water has a second alternative path through the radiator and back to the pump inlet. Most of the pump discharge water will either recirculate or go directly through the radiator. Relatively little will circulate through the engine. The engine is not sufficiently cooled and quickly over-heats.
That's why it's important to never run a 907/ 910/ 912/ etc without a thermostat installed. That little diverter disk is vital. Water flows FROM the lower radiator hose TO the pump. Not the other way around.
Thermostat operation explained
The thermostat closes when it's cold and stops water flowing (apart from usualy a small 'bypass' path). So, with the engine cold, water will be pumped slowly round the block (via the bypass) but the t'stat stops water flowing to the radiator. Just to make things more complex, there's also the route through the heater. So the engine warms up quickly, and when it gets to the critical temperature of the thermostat, this opens and allows water to flow to the rad. When that happens the rad itself (not the header tank where you pour the water in) should *suddenly* go from cold to hot. From ambient air temperature to say 80 deg C in a minute or less. The water flows through the rad, losing heat to the cool air, and cooler water goes back to the engine. If the engine isnt generating much heat, the water may still be coolish when it's gone round the engine and .... back to the thermostat! If it's below the critical temp of the t'stat, this will close again ... the water gets hotter .. t'stat opens .... etc. So, the t'stat may well 'hunt' back and forth between open and closed (or partially each) such that the temperature of the water *IN* the engine stays pretty constant. Constant ... static. Hence thermo stat.So, what if there is not much air flow through the rad? The rad will then not lose heat to the air fast enough, and the water in the rad will overheat. This is 'monitored' by the thermo switch which operates at a higher temperature than we've looked at so far. I.e. HOT rather than 'normal working temperature'. This switches the fan on to cool the radiator.
So, flushing with cold water will keep the thermostat closed and there will only be the small bypass route available at the block.
UK Coolant Specifications
UK Coolant Specifications:BS 6580/A1 : 1997 Specification for corrosion inhibiting, engine coolant concentrate (antifreeze). Minimum performance requirements for concentarates intended for use at appropriate dilutions in the cooling systems of all types of liquid cooled internal combustion engine.
BS 5117:1992 Testing corrosion inhibiting, engine coolant concentrate (antifreeze). 13 parts dealing with different aspects of testing and performance.
There are no equivalant ISO, or IEC specs listed in the BSI catalogue.
Tracing faults....
1. it could be just a broken t'stat. They're easy to check once they are out. It should be closed when cold (visualise how water flows through it). Put it in your wife's best saucepan (only the best will do for a Lotus, I'm suprised Lotus don't sell one for this). Cover with water, heat it up; shortly before the water boils, you should see the t'stat open. Not just a crack, but BIG, about half an inch of movement. If it doesnt open, then cheers are in order, that's 'a' problem found. Take it to a car accessory shop and match one up, they tend to be very similar.2. disconnect the hoses to the rad at the engine ends of the hoses and flush the rad on its own. Check for free flow. Check for muck coming out.
3. If you want to, and if it's easy/possible, flush the heater on its own. disconnect one heater hose in the engine compartment and (with the 2 rad hoses disconnected still and the rad cap off) stick a hosepipe into the heater hose. If you're not sure what results you're getting, disconnect both heater hoses in the engine compartment (I forget where they are ....).
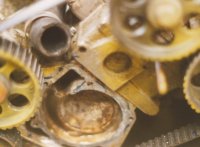
4. If all seems OK, t'stat OK, water flows OK through the rad and you still have overheating: if you have the water pump off, check that the vanes of the impeller are OK and have not rusted away! It can happen. You should know what it should look like if it's OK Having eliminated all the above, by now it may be deposits on the various surfaces in the system. Scale is an insulator; in the rad it will slow down the flow of heat from water to the metal of the rad. This calls for chemical action! This (IMO) calls for expert advice! However, if you've got this far I'd suggest you may as well go ahead with a chemical flush, if it really is a cooling problem and not a faulty head gasket. If the rad is seriously scaled you're looking ata new rad anyway so you may as well try a proper flush. And if you do, I'd say buy 2 bottles of the stuff and do it twice.
Cooling explained....
A cooling system is a means of transferring heat from the inner parts of an engine to the outside world to keep the heat from raising the internal temperature. Notice I don't equate heat and temperature as they are not the same. Heat is a physical quantity that can be carried or made to flow from one area to another, whereas temperature is just an indicator of how much heat is contained in an object, much like a gallon of water is a physical quantity, while x pounds is an INDICATOR of how much water is in a gallon. To remove heat from an engine the coolant is brought in contact with a hot cylinder lining. (Heat flows from a higher temperature item to a lower temperature item, never the reverse.) Heat (the quantity) flows from the cylinder to the liquid. To release the heat into the atmosphere the coolant flows through the radiator which is at a lower temperature than the coolant. The heat then flows from the liquid (hot) to the radiator(cooler). Finally the radiator is hotter than the surrounding air, so heat flows from the radiator to the air. Note there are three separate conversions that have taken place here, cylinder to liquid, liquid to radiator, and radiator to air. If any of these are impeded, engine cooling becomes less efficient or breaks down entirely. A large impediment comes simply from a lack of coolant flow, as it does not allow internal heat to be CARRIED to an efficient radiating point. Instead the coolant temperature rises (remember it goes up if heat goes in and isn't removed) until it is close to or the same as the cylinder. As soon as two items are the same temperature, heat no longer flows, and therefore heat is not being removed from the cylinder.Bubbles in a line are harder to explain, but the problem is basically the introduction of a compressible fluid (air or steam) into a non-compressible (liquid) cooling system. Mid engined cars are particularly prone to this problem as there is almost always a high spot in the coolant path that traps air if present in the system, greatly diminishing the coolant flow. The analogy is a bubble in the blood stream ending up in the heart. The heart can no longer pump efficiently and results in a fatality.
If the coolant isn't circulating properly (e.g. due to the rad core being a bit clogged with muck) then it can't take the heat away from the block quickly enough. The temperature in the rad may be OK ... hot but not too hot ... but the block may get overheated. The thermostat deliberately restricts coolant flow so the engine warms up, but if a failed t'stat or blockage somewhere restricts the flow when the engine is hot, it'll overheat and this will cause (initially) boiling even under pressure, and coolant will blow out of the filler. A head gasket leak (if between cylinder and water jacket) will cause the coolant to blow out but *without* the overheating.
A check (careful !!!). Say the engine appears hot and is blowing out some coolant, but you don't think it's overheated.
Stop the engine and watch the filler cap - if it immediately stops blowing then it suggests it's a leak; cover the filler cap with a rag to protect your hand and CAREFULLY SLOWLY start to remove the filler cap. If nothing much happens, it's not overheated. If you still get blowing or bubbling after the engine is off, it's likely to be overheating. You could again cover the filler cap with rag and CAREFULLY SLOWLY turn it just a bit - don't try to remove it. As it gets turned a bit, the pressure is released and if the engine is boiling, it'll boil some more! If you were to take the cap off it would erupt (that's why the rag is there) and probably scald you even with the rag there. So if it's 'active', turn the cap back on.
White smoke
The standard checks for this kind of head gasket leak are usually fairly reliable (but this may not be much use to you while the car is out of your hands):compression check B&C are going to do this
look for oil in the water
look for 'white smoke' at the exhaust
The white smoke test (IIRC) tends to show up on the overrun, it's like this. Take an engine with a leak between a cylinder and the water jacket (and let's hope it's not your engine). When the engine runs, gases under pressure are forced into the water and over pressurises the system. But, on the overrun, there will be *loads* of suction in the cylinder on the intake stroke (throttle closed) and no pressure in the cylinder on the power stroke. This will (on the faulty engine) suck water in through the leak, and the resulting steam mixed with the bit of exhaust gas gives the 'white smoke'. So, with a warmed up engine, you rev it to the max you're comfortable with (I'd say 4500 for you. assuming a new cam belt properly tightened). Then close the throttle and when the revs are just about down to idle, give it just a bit of throttle. This burns up whatever has been sucked into the cylinders! This is a pretty harsh test because (as above) you are deliberately doing all you can to suck crud into the engine. It's more severe than the MOT in this way! So don't be alarmed if it gives a bit of blue smoke (oil) or black smoke (fuel), these (oil esp) are fairly normal for an oldish engine; you're looking for white smoke (or not, we hope).
A word of caution
WELL: don't put COLD water into a dry HOT engine, water from the hot tap is OK. I'm not sorry for shouting if it avoids a cracked or distorted block. And flush several times to get the corrosive agent out. And keep your face well away from the filler cap at all times, esp when pouring water into a hot engine. Run the engine for a few mins each time you flush it. Oh, and turn the heater to hot !!!!!!.Purging air/overflowing
My personal experience with this has been; If there is steam coming from the overflow tube (not water), and the temp gauge does not show an overheated condition, then there is not enough water in the radiator. The temp sensor reads water temperature, not steam temperature.The header tank should be half full, but there is a problem getting out all the trapped pockets of air when filling the cooling system after it has been drained. Purging the air from the system is an important step and is sometimes time consuming.
The heater should be fully open to the hottest position, this allows the heater core to fill with water. Fill the cold radiator till water is visible then start the engine. You should see a small stream of water from the bypass tube when looking into the header tank. As it gradually warms (stick your finger in it), the thermostat will open. You may see gurgling and spitting as the air is purged from the system. This is a good time NOT to have your face near the header tank. Add more water as needed, but don't overfill. If the engine has not overheated, this is a good time to shut it off and allow things to settle. Fill the tank to half and repeat the procedure. Eventually all the air will be purged. When you're satisfied that everything works properly, repeat the procedure with your 50/50 anti-freeze mix. Your radiator cap and thermostat should be correct. If not, replace them. You may want to monitor your oil level too. After the engine is hot and water disappears, make sure it's not going into the engine oil. Oil will become frothy and muddy looking. Warped head. Not good.
Heater matrix 'wiring'
What damage can occur that you are aware of if it isn't the right way round ? Will it just not heat up properly in the car ?No damage. Perhaps a loss of heating efficiency. But as Lotus heaters go, the unit in the Elite/Eclat is very effective. As long as the matrix (heater core) isn't plugged up or full of air, that heater really works. Usually, the phrase "Lotus heater" is an oxymoron.
If the water valve is in the engine compartment at the rear of the engine, it's the basic mechanical valve. No problem. Hooking the hoses to the matrix backwards should have no noticeable effect... as long as you are not creating a air trap.
If the water valve is in the right footwell near the heater, it's the temperature sensitive valve. In that unit, the cable presets a temperature level. Then a temperature sensitive device continuously adjusts flow in response to the temperature of the water from the engine. It monitors water temperature, not cabin air temperature. Seems like a waste of effort since once the engine is warmed up, it's temperature doesn't vary a great deal.
That valve needs to see engine-temperature water; therefore, it should be plumbed into the feed line that comes directly from the engine. If it received relatively cooler exit-water from the heater matrix, it would be tricked into staying open more. You still wouldn't damage anything, but adjusting the valve for less heat would be difficult.
Once the water passes through either valve, reversing the hose connections from the valve to the matrix will not cause damage and should have minimal effect on efficiency... as long as you are not creating a air trap.
Heater matrix 'wiring' 2
On my 1979 Eclat, the water hose attaches to a nipple pressed into the head, not the water passage in the manifold. The hose passes through the firewall, then through the temperature sensitive water valve (passenger's foot well) and into the lower inlet to the matrix. The temperature sensitive valve is the key. The hottest water should go through the valve first... not exit water that has been cooled by the matrix.I believe earlier cars... or was it non-air conditioned cars... used a simple mechanical Smith's water valve mounted near the engine (on the inlet manifold?). Is that what your car is equipped with? In that case, the mechanical valve is not temperature sensitive and is already mounted at the engine. Kinda hard to screw up the order there. At the heater matrix, my logic says that routing the flow through the matrix from bottom to top would help expel any air bubbles from the matrix.
Convection flow would want the flow to be top down (cooler water descends), but the engine driven pump will ensure sufficient flow with or without convection. Getting trapped bubbles out of the matrix is more important.
Overflow problems
My 1976 Elite had the same overflow symptoms, and it does not overheat, never going much over 70 degr C. There was no overflow siphon bottle (ACBC was too cheap).The remedy is easy, and it improves efficiency by eliminating (over time) the air trapped in the cooling system. No bubbles. So, I added my own. Gotta have one to pass tech inspections on track days - not polite to spew slippery stuff on the ground.
I used a FREE 16oz plastic "drink bottle" with a screw-on cap and a 5/16" flexi-straw. ((( CHEAP & LIGHT - ACBC would approve! ))) I notched the bottom of the straw ("castle" style) so it can't seal off. A short rubber hose connects the straw top to the header tank spit. A tie strap holds the bottle, nestled between hoses and wheel well.
I also put a brand new Stant LEV-R-VENT cap on - 13 pounds. Stant Part # 11329 ($3.99 at Advance Auto). You can also use the "plain" cap, without the lever, #10329 (also seen at WalMart). .
Overflow problems 2
If the coolant isnt circulating properly (e.g. due to the rad core being a bit clogged with muck) then it can't take the heat away from the block quickly enough. The temperature in the rad may be OK ... hot but not too hot ... but the block may get overheated. The thermostat deliberately restricts coolant flow so the engine warms up, but if a failed t'stat or blockage somewhere restricts the flow when the engine is hot, it'll overheat and this will cause (initially) boiling even under pressure, and coolant will blow out of the filler.A head gasket leak (if between cylinder and water jacket) will cause the coolant to blow out but *without* the overheating. So, do you know if it is overheating or not? A check (careful !!!). Say the engine appears hot and is blowing out some coolant, but you don't think it's overheated. Stop the engine and watch the filler cap - if it immediately stops blowing then it suggests it's a leak; cover the filler cap with a rag to protect your hand and CAREFULLY SLOWLY start to remove the filler cap. If nothing much happens, it's not overheated.
If you still get blowing or bubbling after the engine is off, it's likely to be overheating. You could again cover the filler cap with rag and CAREFULLY SLOWLY turn it just a bit - don't try to remove it. As it gets turned a bit, the pressure is released and if the engine is boiling, it'll boil some more! If you were to take the cap off it would erupt (that's why the rag is there) and probably scald you even with the rag there. So if it's 'active', turn the cap back on.
Radiator re-coring
Level 1Boil out the radiator. As described on a previous post by a fellow lister this is a chemical hot bath and is an attempt to dissolve corrosion inside the radiator.
Level 2
Rod out the radiator. As described in a previoius post this service removes the tanks on each end of the radiator and each tube is mechanically cleaned by passing a rod through it. Restores most of the cooling capability of the original radiator.
Level 3
Renew radiator core. This is simply a replacement core of the same density as the original. Cures leaks and heavy built up corrosion.
Level 4
Renew radiator core with denser core. This is an upgrade and will give significant gains in cooling capacity. There are 3 ways to go...
A) More rows - 3 or 4 rows of cooling tubes. More tubes=more cooling. A 3rd row of tubes will add 33% more cooling.
B) Increase tube density. A typical Elan S2/3/4 radiator the tubes are spaced out about 1/2 inch apart. A new core can be installed with the tubes say 3/8 inch apart. This will allow more tubes for more cooling capacity.
C) Recore with BOTH option A and B. Install a core with more rows and more closely spaced tubes can increase cooling capacity over 50%.
Level 5
Do Level 4 option C plus use louvered cooling fins. Louvering the cooling fins adds surface area to the cooling surfaces and dissipates heat more rapidly.
In spring last year I recored the radiator on my Elan S2 with a 3 row high density core (leve 4 option C). It virtually eliminated all overheating problems (I don't even have to use my heater to help!!!). For instance last Friday when I was returning from the Monterey Historics as I left Laguna Seca the temperature was about 85 degrees F. The Elan was holding at about 80 degrees C. It ran like that until I reached Gilroy where the ocean breeze is blocked by the mountains and summer time temperatures are typically in the 90's (F). On this particular afternoon it had to be over 100 degrees F and the Elan's temperature climbed and held steady at 90 degrees C. Never even getting close to overheating. By the time I reached San Jose the air temperature had dropped to the mid-high 80's (F) and the Elan was running at around 82 degrees C. BTW on the trip down the weather was in the 70's (F) and the entire time the coolant temperature did not exceed 80 degrees C (it ran on or near the thermostat). On this 200 mile round trip (home to Laguna and back) there was NO loss of coolant and little oil burned. The cost of recoring the radiator was around $300 USD. Well, worth the money!
Poor heating
My Excel heater was really crap until recently, it is now just crap. I found my thermostat was opening at 72 degress instead of 82 degrees. Changing it help significantly, but it is still crap compared to most cars.I think two control wires run from the heat selection control, one to the water valve and another to a flap within the heater distribution unit that moves a flap to direct air through the heater matrix. My guess is that mine is still not directing air through the matrix properly since the return hose from the heater matrix gets quite hot implying water is flowing through the matrix. Mine has Aircon BTW so it may be different!
Poor heating 2
1. check your thermostat performance. maybe use a hotter one.2. check your vacuum-operated (normally closed) heater valve.
3. hope the heater core is not clogging up. that's a nightmare?
Open the bonnet ;-) and follow the heater hose from the firewall to the motor, where it hooks under the intake manifold.
Sitting approximately over the bell-housing flange of the motor, where the serial numbers are usually stamped, you should find an elbow-shaped water valve, vacuum operated, with a tiny air hose (mine's blue, hard plastic, half as thick as a drinking straw.
The water valve is "normally closed" (without vacuum applied). Pull the little blue hose and see if there is any suction in it when the heater controls are all set for full-on heat. If not, then the "nightmare box" (the contraption behind the dash, with the flappers and levers and vacuum lines and electrics) may be a problem... or you may just have a vacuum leak on one of the connections.
What I did: got a 5/8" O.D. tubular elbow, and replaced the heater valve with the elbow. Heat's on all the time. I made mine of copper tubing soldered into an elbow. Auto parts stores usually have assorted similar fittings. The other, more expensive, desperate measure is to buy a "normally open" heater valve and use it as a dummy.
Demist vents
Also, I am getting no forced air out of my demist vents or 'face' vents, but I am getting (nice warm) air out of the footwell hoses. Any ideas please ?OK, warm means you have vacuum to the dole valve (normally closed). Check the mechanical linkage on the lower lever, which at full right should force the internal flaps to direct air to the demisters. My guess is that the face vents need vacuum actuation (as mine don't blow much either, with no vacuum supply to the controls). I went looking in my shop manual and discovered section "P" is missing. Found the parts pictures though (#10 on sheet PB).
Demist vents 2
This would depend on whether or not the car came with factory air. It looks as though there are no vacuum controls on the box, just behind the temp. sliders on the "no A/C" unit, just cables. There are vacuum actuators (PC4, PC6) and a vac switch(PC2) on the A/C installed unit. If it's cable operated, it should be easy enough to stand on your head under the dash, with a torch, snaking one arm to the front of the console and operate the controls to see if the cables moveDemist vents 3
Looking at the drawings, the good news is that even the A/C jobs use a mechanical linkage to open the demist flapper. So... see if the wire pushrod is bent *too* much -- it doesn't make a straight push from the lower hand crank to the right side elbow crank. The elbow cranks another stiff wire up to the flapper crank end. That one swings upward. Make sure there's no obstruction above ((like some loose hose end got stuffed in over the flapper crank?))Cooling Fans
Since the fans are only 11 inches, and the stock configuration has 2 of them, side by side, is one fan really enough? Should an enclosed shroud be used to concentrate and direct all air flow? Does the surrounding area, where the radiator lives need to be sealed?A
I think the answers could be: Maybe, probably and yes. From my experience, the radiator needs to be in tip-top condition, or replace it with a higher capacity radiator. Single fans, like Ken's and Geth's fan seem to be sufficient for the task. Other things also come into play, such as distributor timing, local climate, traffic conditions, and more. If Geth's car was here in South Florida, land of perpetual summer, it might overheat anytime it had to slow for city traffic. Mine overheated whenever there was stop and go traffic, if I was unfortunate enough to get stuck in it. Since I've had the new 3-core radiator, there has been no overheating. I still need to replace the original foam strips for sealing the gap between body and radiator.Back to Top | Back to technical index