Rover V8 section
Offering up the engine for the first time was both exciting and scary. I had no proof that MY engine was going to fit into the engine bay - all I'd seen up to this point were encouraging E-Mails and a few pictures - and some V8 Elites at Donington (I've never seen a V8 Eclat....) Was the sump going to clear? Were the carbs too high? Would I have to chop a dirty great hole in the bonnet to get the engine in? Was the bellhousing/adapter plate correct - I only had the seller's word for that...the thought of having to redo all that was just not worth considering.The chains went round the engine, the hoist lifted it above the car and, at the acutest of angles and providing the water pump was off, the engine slid into the engine bay with (almost literally) a millimetre to spare.
The engine levelled out and came to rest on the lowest part of the chassis. It fitted! Next job - where were the engine mounts?
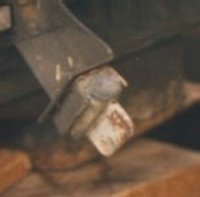
Obviously the previous owner's V8 modification was different to mine - it would have been far too easy to use his old mounts. And the original 907 mounts were also in the wrong position so I raised the engine on the hoist to what would be the final engine level, triple checked that I'd got it right and began measuring and making templates. From these I made 6mm mild steel mounts that would couple the Rover engine mountings to the 907 chassis. The Rover mounts looked like this....

....so all I had to do was make a 'socket' that could safely receive the end and weld the other end to the chassis.
If you are going to 'weld your own', here is a diagram that may help you do it so that hopefully your engine doesn't fly out later on at high revs!
It actually went surprisingly well. Although not normally a patient person, I'm sure that all the sweating and checking that I hadn't missed something vital (oops, you're measuring the wrong engine - that sort of thing) and actually taking a LOT of time to make sure that I did it right first time paid off. Out came the engine, in went the welding gun and on went the mounts.
It may horrify you to know that this was first time I had ever welded in anger!!! ("He did WHAT? That's a classic car, a heavy engine and lots of torque - and he's never welded before?") I had my next door neighbour - who in his time has made show-winning beauties out of rust buckets - watch me practise and then check all my work afterwards and he gave me a seal of approval.
So the car now had the mounts, the engine was together and everything had had two coats of anti rust paint and three coats of top coat. I just needed to convince myself that this was it - the engine was going in and staying in; I hadn't forgotten anything (I DID tighten up the bell housing retaining bolts....didn't I? I'd better just check that I remembered to put the clutch friction plate in) and then it was time for the plunge. A Lotus Esprit owner who many will know, Chris Rose was round at this point offering support, curiosity and vast amounts of wine. Chris is a lovely bloke who, if we're honest, I reckon still pines for his yellow Esprit, Custard. (It was the most beautiful Esprit)....
 ....Anyway, with
Chris's help, and for the last time, the V8 engine lurched off the ground,
swung forward, veered over the fibre glass bonnet (and for the millionth time I
prayed that the chains wouldn't break there!), pitched upwards and eased down
into the engine void. (PLEASE God make the engine mountings be
correct!) There was a clunk as the engine hit the frame, the mountings
were lined up and....it all went together without a hitch.
....Anyway, with
Chris's help, and for the last time, the V8 engine lurched off the ground,
swung forward, veered over the fibre glass bonnet (and for the millionth time I
prayed that the chains wouldn't break there!), pitched upwards and eased down
into the engine void. (PLEASE God make the engine mountings be
correct!) There was a clunk as the engine hit the frame, the mountings
were lined up and....it all went together without a hitch.Stone me - I'd actually gone and done it.
Back to Top | Back to restoration index | Page 1 | Page 6 | Page 8